T-Parts
Sterling, MA
www.t-parts.com
2713RMT
Window Lifter Rod Rebuild kit Instructions
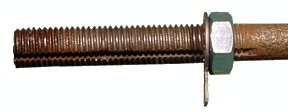
The window lifter rod rebuild kit provides the parts necessary to replace the spring at the bottom of the woindow lifter rod.
This kit fits those cars with the "Swing Lever and Notch" style lifters. This style came out on the 1922 Centerdoor Sedan and
Coupe door windows using a 1/4 inch diameter rod. Shortly after it's introduction, the diameter of the rod was increased to 5/16 inch.
This kit was designed for the 5/16inch diameter rods. It is possible that the spring can be used on the 1/4 inch rod but this has
not been verified.
This kit works on the following models:
| Year | Body Style | Location |
|---|
| 1923 | Centerdoor Sedan | Door Window |
| 1923 | Coupe | Door Window |
| 1923 - 1927 | Fordor Sedan | Quarter Window |
| 1924 - 1925 | Coupe | Quarter Window |
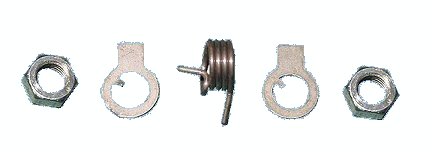
This kit contains the following parts:
| Qty | Part Number | Description |
|---|
| 1 | 5067B | Window Lifter Rod Spring |
| 2 | 5069 | Window Lifter Rod Washer |
| 2 | 5085 | Window Lifter Rod Nut |
Instructions:
- 1. Slide the rubber anti-rattler (not provided) onto the Window Lifter Rod.
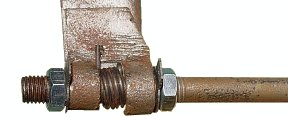
- 2. Screw one of the Window Lifter Rod Nuts onto the rod and run it all the way up.
- 3. Slide one of the Window Lifter Rod Washers onto the rod.
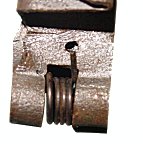
- 4. Install the spring into the opening on the window channel with the center tang facing the bottom of the window.
- 5. Slide the Window Lifter Rod through the top hole in the window channel, through the spring, and through the bottom hole. The center tang of the spring must slide into the slot in the rod.
- 6. Slide the second Window Lifter Rod Washer onto the rod.
- 7. Screw the second Window Lifter Rod Nut onto the rod.
- 8. Adjust the nuts until they are finger tight against the lock washers and the window channel.
- 9. Slide the window molding with the notches over the Window Lifer Rod and position the anti-rattler into the bottom notch.
- 10. Install the window into the car.
Adjustment Instructions:
- 1. Lock the Window Lifter Rod into the top notch of the molding.
- 2. Adjust the position of the upper and lower nuts to position the window in the proper closed position.
- 3. Tighten the nuts enough so that there is no slop in the rod, but the rod is still free to turn easily.
- 4. Bend the tabs of the nuts over the flats of the nuts to prevent the nuts from loosening.